Fair Value Gap vs Order Block: Simple Chart Guide
Data as of 2026-10-20 23:59 UTC · Levels and zones: Znorva analysis engine
Fair value gap vs order block is a useful comparison because both marks can appear on the same move, but they describe different parts of that move. This guide explains the difference in plain English, shows how to spot each one on a chart, and shows how Znorva AI uses the idea inside a rules-based method. Data timestamp: 2026-10-20 23:59 UTC.
What it is
A fair value gap is an imbalance left by a fast move. Price moves away so quickly that a thin area is left behind on the chart. When price returns, that area can act as a reaction zone.
An order block is the source area that helped launch the move. In plain chart reading, people often mark the final opposing candle or a small base before the expansion. That means the order block is not the gap itself. It sits before the move that created the gap.
The simplest way to separate them is this:
- A fair value gap marks imbalance inside the move.
- An order block marks the source area before the move.
They can overlap, and that is why they are often confused. If you want the wider context around liquidity sweep, reclaim, and market structure, this smart money concepts overview connects those ideas clearly.
How to spot it on a chart
Start with the expansion. Find the move that left the area behind. Then ask two different questions: where is the imbalance left by that move, and where did the move start? The first question points to the fair value gap. The second points to the order block.
Keep both marks tied to the same move. That matters. If the gap belongs to one swing and the source candle belongs to another swing, the comparison becomes muddy and less useful.
Then watch the return. If price reacts quickly inside the gap, the imbalance may be the cleaner part of the structure. If price pushes deeper before reacting, the source area may matter more on that revisit.
Chart consistency also matters. A repeated process helps you compare one chart with another instead of redrawing every move from scratch. If you want a faster way to map the same kind of structure across many charts, AI chart reading can help standardize that process.
How Znorva AI uses it (the method)
Znorva AI does not treat every gap or source candle as a valid setup. The method starts after a liquidity sweep of a calendar reference level. Then it waits for a reclaim. In this method, a reclaim means 2 completed closes back beyond the level.
After that filter is confirmed, the engine checks the entry zone in a fixed order: BPR first, then IFVG, then FVG. So a fair value gap is part of the method, but it is not the first zone type considered on its own.
The method tracks 3 targets for each setup. Outcomes are recorded in a consistent way. A setup can reach its final target, have a partial outcome, resolve at breakeven, resolve at the model's stop level, become invalidated before becoming active, expire without becoming active, or remain in progress. You can read the full rules in the methodology.
This wider process matters when you compare a fair value gap with an order block. The gap can be part of the active zone logic, while the source area can help with chart reading and context. Znorva AI also uses Whale Zones to add demand zone and supply zone context around the narrower structure.
A real example from our data
Here is a simple case from BTCUSDT in crypto spot on the 1H timeframe. The model tracked a long-side scenario that became active at a reference price of 81,755.01 on 16 October 2026. It resolved under the model's rules at 82,016.23 on 19 October 2026.
The outcome was a partial outcome: TP1 reached, then resolved. The recorded result was 0.26 R. R is the distance between the reference entry and the model's stop level.
That single case shows the method clearly. The model did not start with “there is a gap, so track it.” It first needed the sweep and the reclaim context. Only then did it apply its zone priority and track the setup under fixed rules.
The recent numbers add useful context. Across the last 60 days, 23 setups resolved under the model's rules. Of those, 3 reached their final target, 9 had a partial outcome, and 11 resolved at the model's stop level. Over the last 30 days, 546 scenarios were invalidated before becoming active.
That invalidation count matters because it shows how much filtering happens before the model starts tracking an active setup. The method rejects far more scenarios than it keeps.
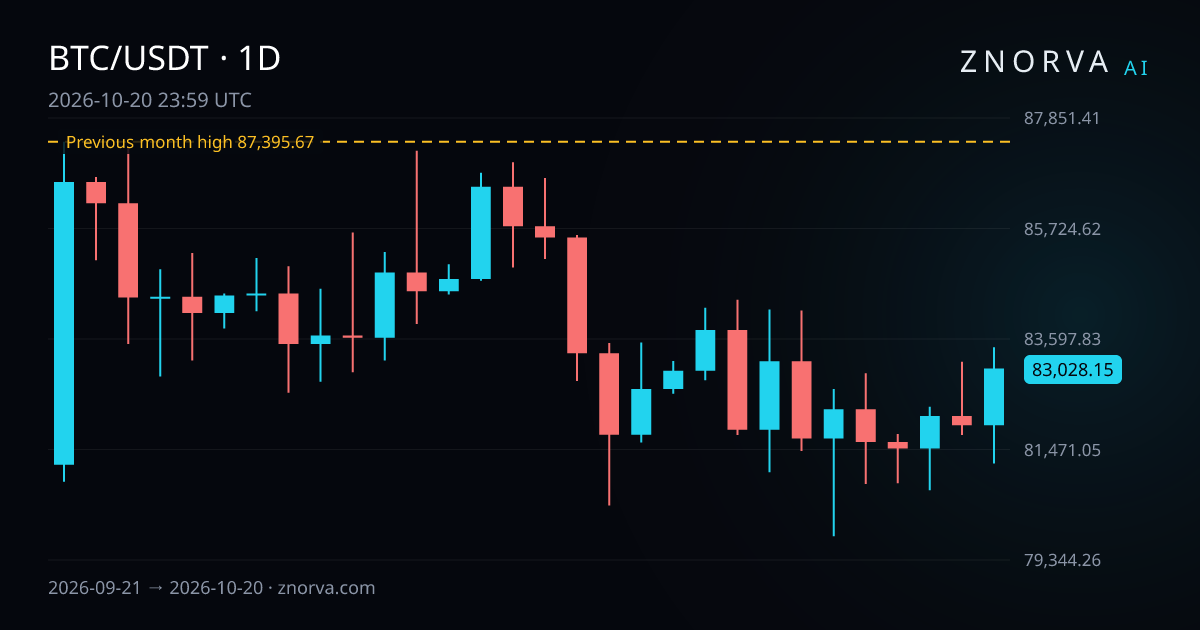
For nearest reference levels, one example in the dataset is Bitcoin's previous month high at 87,395.67. That reference level comes from the period from 1 September 2026 to 30 September 2026. From the daily close of 83,028.15 on 20 October 2026, it was 5.26% above.
Common mistakes
The first mistake is treating both concepts as the same thing. They often appear together, but they answer different chart questions. One marks imbalance inside the move. The other marks the source area before the move.
The second mistake is using a gap without context. In Znorva AI, the setup needs a liquidity sweep first and then a reclaim with 2 completed closes back beyond the level. Without that filter, the chart mark alone does not match the method.
The third mistake is ignoring zone priority. In this method, the engine checks BPR first, then IFVG, then FVG. That means a fair value gap can matter, but it does not automatically come first.
The fourth mistake is skipping reference levels. The method starts from a sweep of a calendar reference level, so nearest reference levels are part of the map, not a side note.
The fifth mistake is ignoring invalidations. In this dataset, 546 scenarios were invalidated over 30 days. That is a reminder that filtering is part of the method.
FAQ
Is a fair value gap the same as an order block?
No. A fair value gap marks imbalance left by a fast move. An order block marks the source area that helped launch that move. They can overlap, but they do not describe the same part of the chart.
Which matters more in fair value gap vs order block?
Context matters more than either label on its own. In Znorva AI, the engine first looks for a liquidity sweep and a reclaim of the reference level. After that, it applies its zone priority rules.
Why does Znorva AI wait for a reclaim?
The reclaim filter requires 2 completed closes back beyond the swept level. That helps remove many scenarios before they become active and keeps the method consistent across charts.